Homemade chocolate ice cream has a rich and storied history that can be traced back to the 18th century. As ice cream gained popularity during this time, the introduction of chocolate took this frozen dessert to new heights. The marriage of creamy ice cream and decadent chocolate quickly captivated the taste buds of dessert enthusiasts around the world.
Table of Contents
Variations of Chocolate Ice Cream
The beauty of homemade chocolate ice cream lies in its versatility and the ability to customize it to suit individual preferences. There is an array of exciting variations to explore. For those seeking a textural adventure, consider adding mix-ins like chocolate chips, crushed cookies, or chopped nuts during the churning process. This creates delightful surprises of crunch and flavor in every bite. Furthermore, the choice of chocolate can dramatically impact the taste profile of the ice cream. Whether you opt for dark, milk, or even white chocolate, each variation brings its unique character to the dessert.
Tips and Tricks for Making Easy Chocolate Ice Cream
Creating a batch of delicious homemade chocolate ice cream is a simple and rewarding process. To elevate the flavor, start by selecting high-quality ingredients such as premium cocoa powder and real chocolate. This ensures a rich and authentic taste experience. When it comes to the churning process, carefully follow the instructions provided by your ice cream maker or employ the manual method described earlier. The goal is to achieve the perfect balance between a smooth and creamy texture without over-churning or under-churning. Once the ice cream is ready, be sure to store it in an airtight container to preserve its freshness and prevent the formation of ice crystals.
Homemade chocolate ice cream is a timeless treat that allows for creativity and personalization. With its intriguing history, a multitude of variations, and helpful tips and tricks, crafting this delectable dessert at home has never been easier. Whether you savor it on its own, adorn it with toppings, or use it as the star ingredient in an indulgent sundae, homemade chocolate ice cream is sure to bring joy and satisfaction to every dessert lover. Embrace the journey of making this classic treat and relish in the rich, creamy flavors that will undoubtedly leave you craving more.
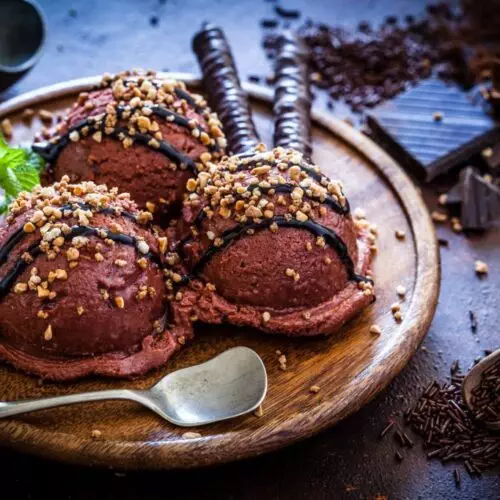
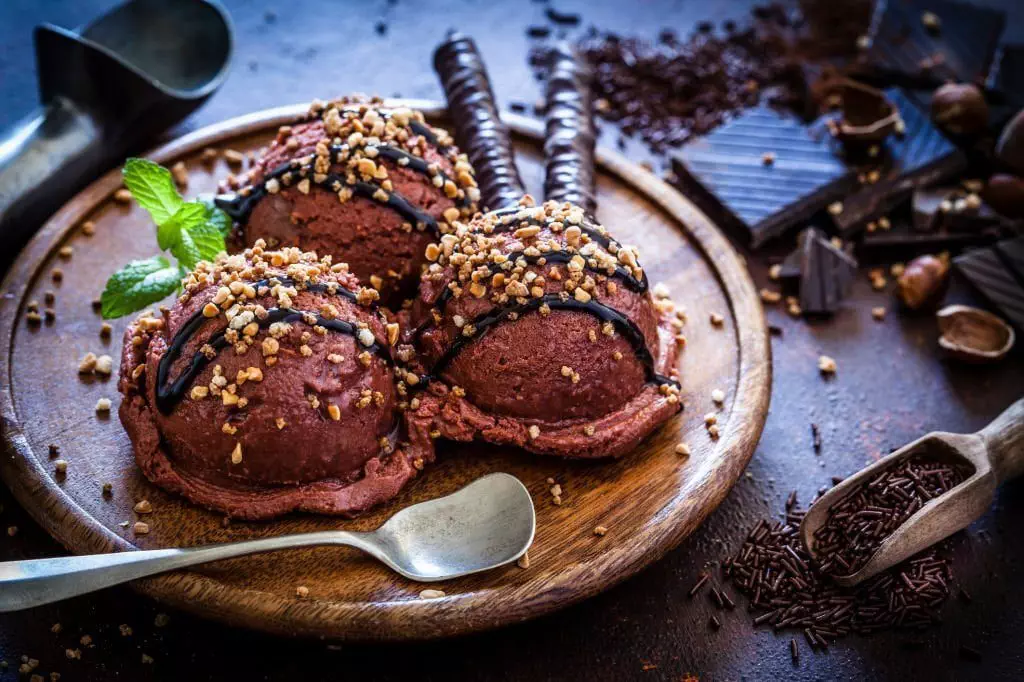
Homemade Chocolate Ice Cream: Made Easy
Equipment
- Ice Cream Maker Optional
Ingredients
- 2 cups Heavy cream
- 1 cup Whole milk
- ¾ cup Granulated Sugar
- ¼ cup Unsweetened cocoa powder
- 4 oz Semisweet chocolate chopped
- 4 Large egg yolks
- 1 tsp Vanilla extract optional
Instructions
- In a saucepan, combine the heavy cream, milk, sugar, and cocoa powder. Place the saucepan over medium heat and whisk the mixture until the sugar and cocoa powder are fully dissolved.
- Add the chopped chocolate to the saucepan and continue whisking until the chocolate is completely melted and the mixture is smooth. Remove the saucepan from heat.
- In a separate bowl, whisk the egg yolks until they are well beaten. Slowly pour about 1/2 cup of the warm chocolate mixture into the egg yolks, whisking constantly to temper the yolks and prevent them from curdling.
- Pour the egg yolk mixture back into the saucepan with the remaining chocolate mixture, whisking constantly.
- Place the saucepan back over medium heat and cook the mixture, stirring continuously, until it thickens slightly and coats the back of a spoon. This should take about 5-7 minutes. Do not let it boil.
- Remove the saucepan from heat and stir in the vanilla extract. Let the mixture cool for about 10 minutes at room temperature.
- Transfer the chocolate mixture to a container or bowl, cover it with plastic wrap (make sure the plastic wrap touches the surface of the mixture to prevent a skin from forming), and refrigerate for at least 4 hours or overnight.
- Once the mixture is thoroughly chilled, pour it into an ice cream maker and churn according to the manufacturer's instructions. This usually takes about 20-30 minutes.
- Transfer the churned ice cream to a lidded container and freeze for an additional 3-4 hours, or until firm.
- Serve the chocolate ice cream in bowls or cones, and enjoy!