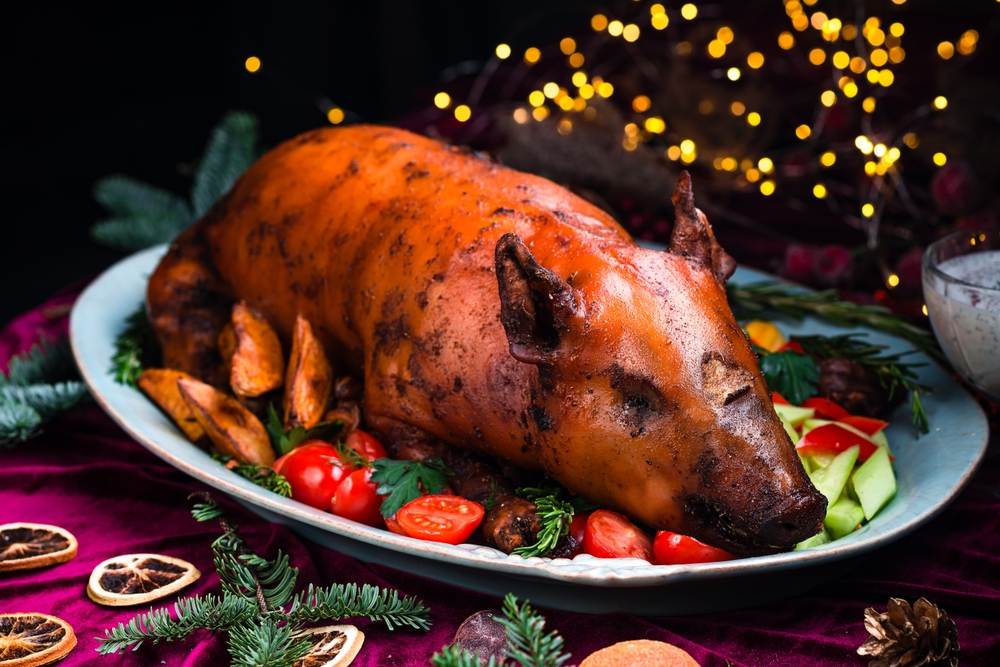
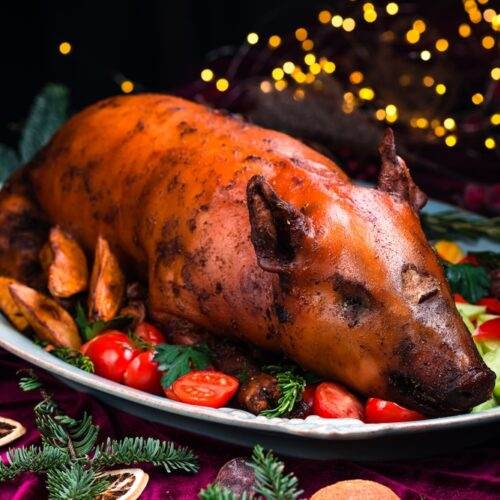
A few dishes embody the essence of Spanish gastronomy, such as cochinillo asado. A symbol of celebration and culinary mastery, this roast suckling pig recipe is most famously associated with the region of Castilla y León, and more specifically, the medieval city of Segovia. Traditionally slow-roasted in a wood-fired oven, cochinillo combines tender, juicy meat with a golden, crackling-crisp skin that shatters under the pressure of a spoon—a hallmark of perfection.
At home, however, replicating the classic Segovian version can be challenging. But with the right ingredients, technique, and practical adaptations, you can achieve a restaurant-quality cochinillo right in your standard domestic oven. I’ve done it myself, and the result is stunning: juicy inside, crispy outside, and full of rustic charm.
Let’s dive into how you can master this legendary recipe, no wood-fired oven required.
Table of Contents
Cochinilo Asado: Choosing the Right Suckling Pig for Roasting
Cochinillo isn’t just any pig—it’s a suckling pig that’s no older than three to four weeks and weighs between 4 and 6 kilograms (9–13 lbs). This young age ensures meat remains tender, delicate, and almost buttery in texture.
Look for a pig with pale, unblemished skin, essential for achieving that perfect crunch. Make sure it’s been cleaned and gutted by your butcher, and if possible, ask them to split it down the backbone for easier roasting.
If sourcing an entire suckling pig is challenging, some specialty butchers and online vendors offer half-cochinillo cuts, which are equally delicious and easier to manage in a smaller home oven.
Prepping the Cochinillo Asado: Cleaning and Seasoning Tips
Preparing the pig properly is half the battle. Here’s how I approach it at home for the best results:
- Dry it thoroughly. Moisture is the enemy of crispy skin. Pat the cochinillo dry with paper towels and let it rest uncovered in the fridge for a few hours or overnight to dehydrate the surface.
- Season with simplicity. Traditional recipes use only salt and occasionally a touch of lard or olive oil. I skip the lard sometimes and still get an amazing result. Sprinkle coarse sea salt generously over the skin and interior.
- Optional aromatics. If you want subtle flavor infusion, place a few garlic cloves, bay leaves, or rosemary sprigs inside the cavity. Avoid overpowering spices—they detract from the delicate flavor of the meat.
- Tuck the ears and tail with foil to prevent burning.
- Score the skin lightly in a criss-cross pattern to help fat render and create a blistered, crispy texture.
How to Roast Cochinillo at Home for Crispy Perfection
Without a wood-fired oven, you’ll need to rely on heat control and technique to mimic that authentic effect.
- Preheat your oven to 170°C (340°F). Use convection if available; if not, regular heat is fine.
- Use a roasting rack or bed of vegetables (onion, carrot, garlic) in a deep pan to elevate the pig. Pour in a bit of water to generate steam.
- Roast slowly for about 2.5 to 3 hours. Baste the skin occasionally with pan juices to build layers of flavor and help with caramelization.
- Steam support (optional): If your oven has a steam setting, use it in the first half of cooking. I’ve noticed that this helps keep the meat extra juicy and tender.
- Final crisping: Increase the oven temperature to 220°C (430°F) in the last 15–20 minutes to crisp up the skin. Watch closely to avoid burning.
You’ll know it’s ready when the skin is deeply golden and sounds like thin glass when tapped.
Perfect Side Dishes: Potatoes and Traditional Pairings
Classic cochinillo asado doesn’t need much to shine, but the right accompaniments enhance the experience. My go-to is roasted potatoes, which absorb the pig’s juices and turn into flavor bombs.
Other traditional sides include:
- Simple green salad with olive oil and vinegar
- Crusty bread to mop up the pan sauce
- White wine or light red (like Ribera del Duero)
Sometimes, I skip the lard and let the pig roast on a bed of potato slices. They turn golden and crisp underneath, making the whole meal practically effortless.
7 Expert Tips for Juicy and Crunchy Cochinillo Asado
These tips come from both tradition and personal experience. Use them to elevate your cochinillo game:
- Dry skin equals crispy skin: Leave it in the fridge uncovered overnight.
- Protect the delicate parts: Foil on the ears and tail.
- Use a roasting rack to ensure even heat distribution.
- Roast low and slow to preserve the internal moisture.
- Don’t over-season: Salt is enough.
- Blast of heat at the end: That’s the key to a crunchy crust.
- Rest before carving: Let the juices redistribute, 10–15 minutes.
Following these steps, I consistently achieve a texture similar to cuchifrito—crispy outside, melt-in-your-mouth inside.
Cochinillo Asado Recipe Variations: No Lard, Steam Oven, and More
Cochinillo is highly adaptable. Here are some variations I’ve tested:
- Without lard: Use a bit of olive oil or go dry—the fat from the pig is often enough.
- With steam oven helps retain moisture and soften the meat.
- With patatas: Slice potatoes under the pig as a rack and a side dish.
- With aromatic herbs: Add thyme or rosemary for subtle depth.
Experiment to find your favorite combination, but the traditional simplicity never fails.
Cochinillo Asado: Related Spanish Recipes to Explore Next
If cochinillo sparks your love for Spanish cuisine, here are a few recipes worth diving into:
- Lechazo Asado: Roasted milk-fed lamb, another Castilla classic
- Cordero al Horno: Slow-roasted lamb shoulder with garlic and rosemary
- Cuchifrito: Fried pork with that irresistible dual texture
- Paella Valenciana: Spain’s most iconic rice dish, with rabbit and snails
- Fabada Asturiana: Hearty bean stew from northern Spain
These dishes echo the same values: respect for ingredients, simple techniques, and deep flavor.
Frequently Asked Questions About Cochinillo Asado
Q: Can I cook cochinillo in a regular oven?
Absolutely. With a bit of technique (low and slow, then crisping at the end), you can get excellent results.
Q: Do I need to use lard?
Not necessarily. I’ve done it both ways. Olive oil or even dry roasting works well.
Q: What’s the ideal weight for home cooking?
Anywhere from 4 to 6 kilograms is perfect for most ovens.
Q: How long should I cook it?
Roughly 2.5 to 3 hours at 170°C, then crisp at high heat.
Q: Can I freeze leftovers?
Yes, but the skin will lose crispness. Best eaten fresh.
Conclusion
Cochinillo asado at home is a culinary challenge that rewards patience and attention to detail. With the right techniques, even a basic oven can deliver a result that rivals traditional Segovian fare: tender meat, crispy skin, and deep satisfaction.
Have you ever tried making cochinillo yourself?
Share your experience in the comments below or subscribe to our newsletter for authentic recipes, kitchen tips, and cultural food insights.
Let’s keep the spirit of Spanish cooking alive—one delicious bite at a time.
Cochinillo Asado: 7 Expert Tips for a Perfect Recipe
Ingredients
- 1 (9–13 lbs) Suckling pig , cleaned and optionally halved
- Coarse salt
- 1 cup Water
- Olive oil or lard (optional)
- Optional: sliced potatoes, garlic, bay leaves, rosemary
Instructions
- Preparation:Rinse the suckling pig under cold water and dry it thoroughly with paper towels. For extra crispiness, leave it uncovered in the fridge overnight to dry out the skin.Season the entire surface and cavity of the pig with coarse salt. Optionally, rub a thin layer of olive oil or lard over the skin for extra flavor and color.Cover the ears and tail with foil to prevent burning during roasting.
- Roasting Setup:Preheat your oven to 340°F (170°C).Place the pig belly-side on a roasting rack or on top of a bed of sliced vegetables or potatoes in a roasting tray.Pour about 1 cup of water into the tray, without touching the skin—this creates gentle steam that helps keep the meat juicy.
- Initial Roasting:Roast the cochinillo for about 2.5 to 3 hours, depending on the size. During cooking:Baste the pig every 30–40 minutes using a spoon or brush to moisten the skin with pan juices.If you have a steam function, use it during the first half of cooking to enhance tenderness.
- Crisping the Skin:In the final 15–20 minutes, increase the oven temperature to 430°F (220°C).Rotate or adjust the pig slightly if needed so that all areas of the skin crisp evenly.The skin is ready when it turns golden brown and blistered, and makes a crackling sound when tapped.
- Resting and Serving:Remove the pig from the oven and let it rest for 15 minutes before carving.Use kitchen shears or a sharp knife to portion it into ribs or quarters. The meat should be juicy and tender, almost buttery.